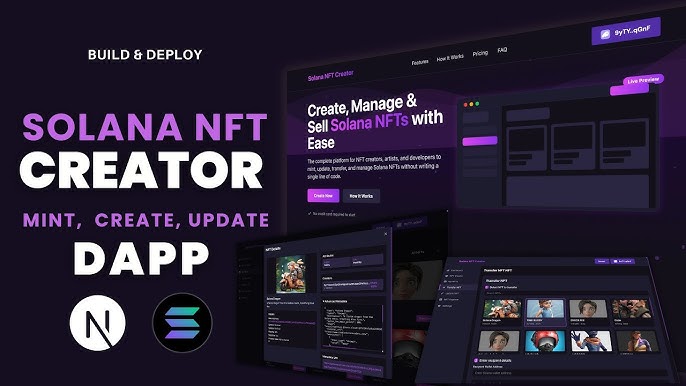
How to Build an NFT Minting DApp Using Solana and Metaplex
In the world of Web3, creating an NFT minting DApp is a rite of passage for a developer. It’s the perfect project to learn how a user-facing application interacts with on-chain programs, permanent storage, and a user’s wallet. It proves you can build a full-stack, decentralized experience.
This guide will take you through the entire process, from start to finish. We are not just creating a token; we are creating a digital collectible with an image and rich metadata, and building a simple but clean web interface for users to mint it. We will use the official, modern 2025 tech stack, so you’ll be learning the right way from the get-go.
Our Tech Stack for This Build:
- Frontend: Next.js (React)
- On-Chain Interaction: Metaplex Umi Library (the new standard)
- Wallet Integration: Solana Wallet Adapter
- Asset Storage: Arweave (via the Bundlr Network)
Ready? Let’s begin.
Part 1: The Pre-flight Checklist – Preparing Your NFT Asset
Before we write any code, we need to prepare the two components of our NFT: the image and its metadata.
1. Understanding NFT Components An NFT isn’t just an image on the blockchain. It consists of:
- The On-Chain Token: An actual SPL token with a supply of 1.
- The Metadata Account: A separate on-chain account, governed by the Metaplex Token Metadata program, that is associated with the token. This account holds data like the NFT’s name and symbol.
- The Off-Chain JSON File: The metadata account holds a link to an external JSON file. This file contains the rich details: the description, attributes, and, most importantly, the link to the actual image.
2. Preparing Your Image and a metadata.json File First, choose an image for your NFT (e.g., my-nft.png).
Next, create a metadata.json file in the same folder. This file describes your NFT according to the Metaplex standard.
{
    "name": "My First Umi NFT",
    "symbol": "UMI1",
    "description": "A test NFT created using the modern Umi library for Metaplex!",
    "image": "REPLACE_WITH_IMAGE_URL",
    "attributes": [
        {
            "trait_type": "Rarity",
            "value": "Common"
        },
        {
            "trait_type": "Year",
            "value": "2025"
        }
    ],
    "properties": {
        "files": [
            {
                "uri": "REPLACE_WITH_IMAGE_URL",
                "type": "image/png"
            }
        ]
    }
}
3. Uploading to Permanent Storage (Arweave) You can’t just link to an image on your personal server; it needs to be on permanent, decentralized storage. Arweave is the standard for this. We’ll use the Bundlr Network, which makes uploading to Arweave incredibly simple.
First, install the Bundlr CLI in your terminal:
npm install -g @bundlr-network/client
Fund your Bundlr balance with a tiny amount of Devnet SOL:
bundlr fund 100000000 -h https://devnet.bundlr.network -w ~/.config/solana/id.json -c solana
Now, upload your image file:
bundlr upload-file ./my-nft.png -h https://devnet.bundlr.network -w ~/.config/solana/id.json
This will give you an Arweave URL (e.g., https://arweave.net/some-hash). Copy this URL.
Paste the Arweave image URL into your metadata.json file, replacing both REPLACE_WITH_IMAGE_URL placeholders. Now, upload the JSON file itself:
bundlr upload-file ./metadata.json -h https://devnet.bundlr.network -w ~/.config/solana/id.json
This final URL is your metadata URI. Save it. This is what you’ll tell Metaplex to use for your NFT.
Part 2: Setting Up the DApp Frontend
Let’s create our Next.js project and install the necessary dependencies.
1. Initialize a Next.js Project
npx create-next-app@latest solana-nft-minter
cd solana-nft-minter
2. Install All Dependencies This command installs everything we need: the wallet adapter for wallet connections and the new Umi libraries for interacting with Metaplex.
npm install @solana/web3.js @solana/wallet-adapter-react @solana/wallet-adapter-react-ui @solana/wallet-adapter-wallets @metaplex-foundation/umi-bundle-defaults @metaplex-foundation/umi-signer-wallet-adapters @metaplex-foundation/mpl-token-metadata
3. Configure the Wallet Adapter As in previous guides, open pages/_app.js and wrap your application with the wallet providers. This is a standard setup for any Solana DApp.
// In pages/_app.js
import React from 'react';
import { WalletAdapterNetwork } from '@solana/wallet-adapter-base';
import { ConnectionProvider, WalletProvider } from '@solana/wallet-adapter-react';
import { WalletModalProvider } from '@solana/wallet-adapter-react-ui';
import { PhantomWalletAdapter } from '@solana/wallet-adapter-wallets';
import { clusterApiUrl } from '@solana/web3.js';
require('@solana/wallet-adapter-react-ui/styles.css');
import '../styles/globals.css';

function MyApp({ Component, pageProps }) {
    const network = WalletAdapterNetwork.Devnet;
    const endpoint = React.useMemo(() => clusterApiUrl(network), [network]);
    const wallets = React.useMemo(() => [new PhantomWalletAdapter()], []);

    return (
        <ConnectionProvider endpoint={endpoint}>
            <WalletProvider wallets={wallets} autoConnect>
                <WalletModalProvider>
                    <Component {...pageProps} />
                </WalletModalProvider>
            </WalletProvider>
        </ConnectionProvider>
    );
}

export default MyApp;
Part 3: The Core Logic – Building the Umi Minter
This is where the magic happens. We’ll write the function that creates and mints our NFT. Open pages/index.js and let’s get started.
// In pages/index.js
import { useState } from 'react';
import { useWallet } from '@solana/wallet-adapter-react';
import { WalletMultiButton } from '@solana/wallet-adapter-react-ui';
import { createUmi } from '@metaplex-foundation/umi-bundle-defaults';
import { walletAdapterIdentity } from '@metaplex-foundation/umi-signer-wallet-adapters';
import { mplTokenMetadata } from '@metaplex-foundation/mpl-token-metadata';
import { generateSigner, transactionBuilder, some } from '@metaplex-foundation/umi';

export default function Home() {
    const wallet = useWallet();
    const [minting, setMinting] = useState(false);
    const [txSig, setTxSig] = useState('');

    // 1. Create a Umi instance
    const umi = createUmi('https://api.devnet.solana.com')
        .use(walletAdapterIdentity(wallet))
        .use(mplTokenMetadata());

    // 2. The core minting function
    async function mintNft() {
        if (!wallet.publicKey) {
            alert("Please connect your wallet!");
            return;
        }

        setMinting(true);
        setTxSig('');

        try {
            // 3. Generate a keypair for the NFT
            const mint = generateSigner(umi);

            // 4. Build the transaction
            const tx = transactionBuilder()
                .add(
                    createV1(umi, {
                        mint,
                        authority: umi.identity,
                        name: "My First Umi NFT",
                        uri: "YOUR_ARWEAVE_METADATA_URL", // 🚨 PASTE YOUR ARWEAVE URL HERE
                        sellerFeeBasisPoints: { basisPoints: 500, identifier: '%' }, // 5% royalties
                        isCollection: false,
                        tokenStandard: 0, // 0 = NonFungible
                    })
                );

            // 5. Send the transaction
            const { signature } = await tx.sendAndConfirm(umi, {
                confirm: { commitment: "finalized" },
            });

            setTxSig(signature.toString());

        } catch (error) {
            console.error("Minting failed:", error);
            alert("Minting failed! Check the console for details.");
        } finally {
            setMinting(false);
        }
    }

    // UI Rendering
    return (
        <div style={{ padding: '20px', display: 'flex', flexDirection: 'column', alignItems: 'center' }}>
            <h1>My Awesome NFT Mint</h1>
            <WalletMultiButton />

            <div style={{ marginTop: '20px' }}>
                <button
                    onClick={mintNft}
                    disabled={!wallet.publicKey || minting}
                    style={{ fontSize: '18px', padding: '10px 20px' }}
                >
                    {minting ? 'Minting...' : 'Mint NFT'}
                </button>
            </div>

            {txSig && (
                <div style={{ marginTop: '20px' }}>
                    <p>Mint Successful!</p>
                    <a
                        href={`https://solscan.io/tx/${txSig}?cluster=devnet`}
                        target="_blank"
                        rel="noopener noreferrer"
                    >
                        View on Solscan
                    </a>
                </div>
            )}
        </div>
    );
}
🚨 IMPORTANT: In the code above, find the line uri: "YOUR_ARWEAVE_METADATA_URL" and paste the Arweave URL for your metadata.json file that you saved in Part 1.
Part 4: Running Your DApp
That’s it! In your terminal, run npm run dev. Open http://localhost:3000 in your browser. You should see your DApp.
- Connect your wallet (make sure it’s set to Devnet).
- Click the “Mint NFT” button.
- Approve the transaction in your wallet.
After a few seconds, you should see a “Mint Successful!” message with a link to the transaction on Solscan. Check your wallet—your brand new NFT will be there!
Conclusion & Next Steps
Congratulations, you’ve just built a complete, end-to-end NFT minting application using the most modern tools available on Solana in 2025. You’ve learned how to prepare and upload metadata, set up a DApp frontend, and use the powerful Umi library to create a digital asset on-chain.
From here, the possibilities are endless. You could:
- Create a Collection: Explore the Metaplex Candy Machine standard to manage the minting of a large collection (e.g., 10,000 NFTs).
- Add a Mint Price: Modify the transaction to require the user to send SOL or another token to your wallet as payment for the mint.
- Build a Gallery: Create a new page that fetches and displays all the NFTs currently held in the connected user’s wallet.
You now have the foundational skills to build almost any NFT-based project on Solana. Happy building!