Create OpenBook Market ID
How to Create an OpenBook Market ID on Solana: A Step-by-Step Guide
You’ve successfully created your SPL token—that’s a fantastic start! Now you’ve arrived at one of the most exciting stages of your project: getting your token listed on a Decentralized Exchange (DEX) like Raydium so people can start trading it. However, when you go to create a liquidity pool on Raydium, you’re met with a mandatory field: “Please enter an OpenBook Market ID.”
So, what exactly is that, and why is it so important? Don’t worry. In this guide, we’ll walk you through what an OpenBook Market ID does, why it’s essential, and most importantly, how you can create one in seconds for a low cost of just 0.2 SOL, without getting bogged down in technical jargon.
What is an OpenBook Market ID and Why Do You Need It?
In the simplest terms, an OpenBook Market ID is the identity of a “digital marketplace” created specifically for your token. Just like a stock needs a ticker symbol to trade on a stock exchange, your token needs an order book to be traded against another token (like SOL or USDC).
This order book tracks all the “buy” and “sell” orders, which is what allows a price to be formed. Many major DEXs in the Solana ecosystem, including Raydium, are built on top of the OpenBook protocol for this fundamental infrastructure. Therefore, to create a trading pair (liquidity pool) on Raydium, you first need to create the OpenBook market where the buy and sell orders for that pair will be recorded. The address of that market is your Market ID.
Step-by-Step: Creating Your OpenBook Market ID
You don’t need to know how to code to do this. Thanks to user-friendly and low-cost tools like getopenbook.space, you can complete the process with ease.
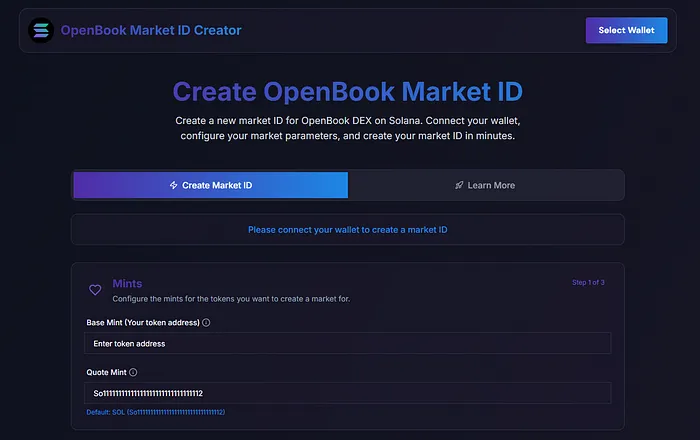
Step 1: Visit the Tool and Enter Your Token Addresses
Open your browser and go to https://www.getopenbook.space. You will see two primary fields:
- Base Mint: This is the address of your main token. Paste your SPL token address here.
- Quote Mint: This is the token you want to pair your main token with. In other words, what will people use to buy your token, or what will they receive when they sell it? Typically, this is SOL, USDC, or USDT.
- SOL:
So11111111111111111111111111111111111111112 - USDC:
EPjFWdd5AufqSSqeM2qN1xzybapC8G4wEGGkZwyTDt1v - USDT:
Es9vMFrzaCERmJfrF4H2FYD4KCoNkY11McCe8BenwNYB
- SOL:
Step 2: Understanding and Configuring the Market Settings
This section determines how your market will behave and is the most important part to get right.
- Min. Order Size: This sets the smallest possible amount of your token a user can place in a single buy or sell order. This setting depends on the number of decimals your Base Mint (your token) has.
- Example: If you enter
4, a user can place an order for as little as 0.0001 of your token (10⁻⁴). - Example: If you enter
0, the minimum order size is 1 full token (10⁰). - Example: If you enter
1, the minimum order size is 0.1 tokens (10⁻¹).
- Example: If you enter
- Price Tick: This determines the price precision of your token—how many decimal places the price will show.
- Example: If you set this to
5, the token price can be displayed with high precision, like 11.12345. - Example: If you set this to
4, the price will be less precise, like 11.1234.
- Example: If you set this to
Step 3: Applying the Golden Rule
There is one single, crucial rule you must follow when configuring these settings:
THE RULE: The sum of Min. Order Size + Price Tick CANNOT EXCEED the number of decimals of the Quote Mint (the token you are pairing against).
- Decimals for USDC: 6
- Decimals for USDT: 6
- Decimals for SOL: 9
Practical Example: Let’s say you are pairing your token against USDC (which has 6 decimals).
- You can set
Min. Order Size= 3 andPrice Tick= 3. (Sum: 6. Valid 👍) - You can set
Min. Order Size= 4 andPrice Tick= 2. (Sum: 6. Valid 👍) - You cannot set
Min. Order Size= 4 andPrice Tick= 3. (Sum: 7. Invalid 👎)
Once you’ve configured your settings according to this rule, click the “Create” button. Your wallet will ask you to approve a transaction for approximately 0.2 SOL. After you approve it, your Market ID will be created and displayed on the screen. Copy this ID and save it in a safe place!
Next Step: Adding Liquidity on Raydium
Now that you have the identity for your marketplace, it’s time to bring that market to life by adding liquidity.
- Go to Raydium’s liquidity creation page: https://raydium.io/liquidity/create/
- The page will ask you for a Market ID. Paste the OpenBook Market ID you just created and saved into this field.
- Raydium will recognize your market and direct you to the “add liquidity” screen.
- Here, you will set the initial price of your token. You do this by defining the ratio of your token to the quote token you are depositing. For example, if you deposit 1,000,000 of your tokens and 10 SOL, you are setting the initial price based on that ratio.
- After setting the amounts, confirm the transaction. You will pay a network fee for this, typically between 0.45 – 0.75 SOL, depending on network conditions.
Conclusion
Congratulations! You are now not just an SPL token owner, but also the founder of a market for that token. With this guide, you’ve learned what an OpenBook Market ID is, created your own market at a low cost, and taken the first and most important step to making your token tradable on Raydium.
Remember, the technical steps are just the beginning. The true value of your project will be measured by the community you build and the utility you provide from this point forward. Good luck!
Absolutely brilliant guide! I was totally lost before reading this, but now I feel confident creating my own OpenBook Market ID. Thank you!
This article saved me hours of research. Everything is so clearly laid out—even beginners like me can follow it easily
Incredible content! The integration with Raydium and the explanation about liquidity ratios were exactly what I needed to move forward.
Excellent resource!